It is often useful to be able to steer the execution of workflows. This chapter describes workflow steering in terms of stopping execution and editing intermediate values. Currently there are two ways to interfere with workflow execution: pausing or cancelling it.
Pausing of workflows can be achieved in two ways, by placing breakpoints at which execution will automatically pause or by manually pausing the entire workflow.
Breakpoint is a term borrowed from debugging tools of software programming. Such tools mark points in the program code with a 'breakpoint' such that execution of the program pauses when the breakpoint is encountered, exposing the internal state of the program to the user. In a similar manner, breakpoints in workflows “mark” the processors where execution will be paused. Input and output data of a paused processor may be edited interactively from within the workflow status display.
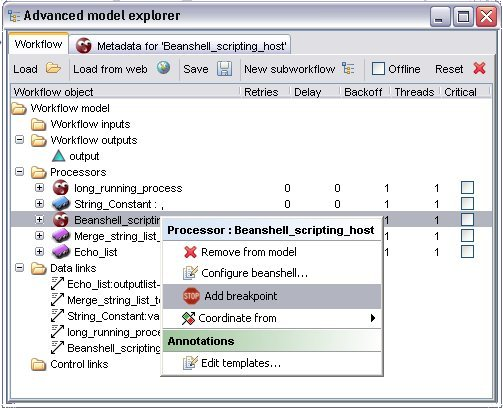
Adding a breakpoint onto a processor can be done during the construction of the model: right-click on a processor in the AME and choose 'Add breakpoint' from the pop-up menu:
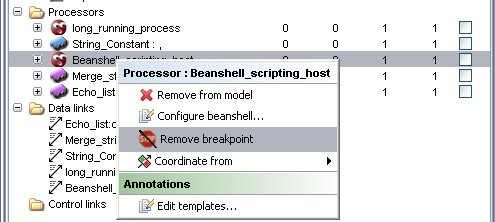
This process adds a breakpoint to the workflow model and will be there for every execution, until user chooses to remove it. Breakpoints may be removed in a similar way:
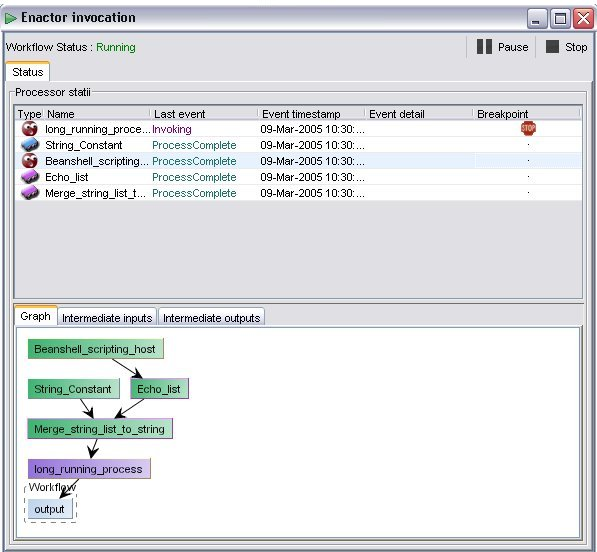
Breakpoints can also be added (or removed) to the model during its execution! Adding a breakpoint at runtime can be done on the “Enactor Invocation” window by left-clicking on cell of the breakpoint column of the status table that corresponds to the processor that one chooses to add/remove a breakpoint. At the execution level, breakpoints are added or removed only for the current execution:
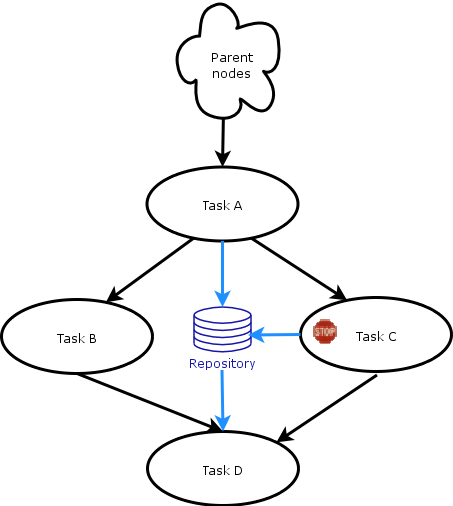
Before using breakpoints one has to know the behaviour of a processor containing one. In contrast with debugging tools in software engineering, breakpoints in Taverna pause processes after they have produced their output and before they call the next processor(s) to run. At this point users are allowed to edit the intermediate output data produced by the paused processor. The reason of this is to protect and help user to maintain the integrity and consistency of data in distributed and parallel computation models and prevent non-deterministic workflows. Consider for example a workflow that has a processor A with two outputs feeding data to two parallel execution branches (see diagram below). Theses branches merge at a later point producing a single result. If a software-debugger style breakpoint is added on the processor C and change the output of A then task C will have the new version of the data while B can have either the old or the new ones. This situation is a race condition and can lead to any, non-deterministic, results of the workflow. Additionally if the input/output intermediate data are kept into repositories, there will be two versions of the same data in the repository causing errors on provenance plug-ins. So in order to edit/check intermediate data at one point of the workflow, the breakpoint should be placed at the processor that is going to produce the intermediate data and not on the one that is going to receive them.
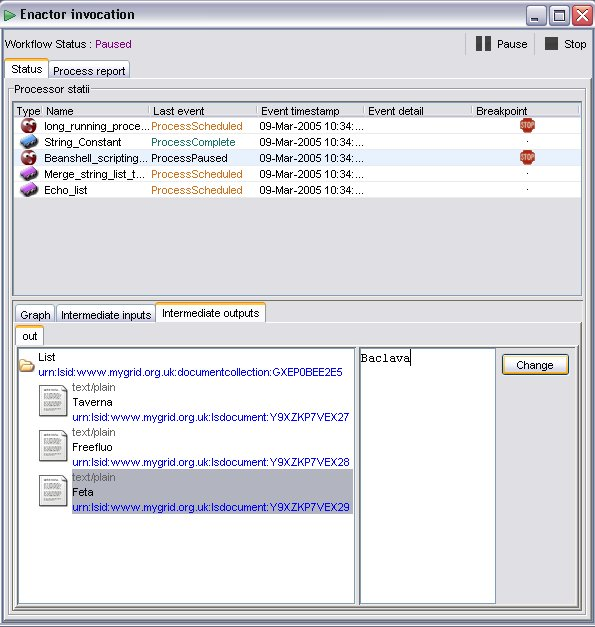
As already mentioned at the description of breakpoints, it is crucial at which point of workflow execution intermediate data are edited. To avoid any unwanted erroneous behaviour of the workflow, intermediate results are allowed to be edited only in specific cases. These are when the processor producing these results is paused and has completed executing but not yet sent the results to the next processor(s) in the graph. At this point users can edit and change only the intermediate output. The procedure is: First choose the processor at the status table of the invocation window, then click on the intermediate output tap at the bottom of the window (see figure 3.1) and choose one of the available output ports (if more than one). At this point one should be able to see the value(s) of the output data. Choose one of the values (if more than one available) and on the bottom-right frame of the window a text box and a button will appear (see figure 3.1). Edit the value on the text box and press change button. Intermediate data has now been changed:
As previously described in this documents about LSIDs, once they have been created, they cannot be changed. For this reason every time the user successfully changes the intermediate data, a new LSID is created for this data object (and for the parent nodes if this data belongs to a collection of data objects). The old version of the LSID object remains into the system until is consumed from all the provenance plug-ins, repositories; while an event is triggered to notify the plug-ins that the data has been updated. So none of the old or the new versions of the data are lost.